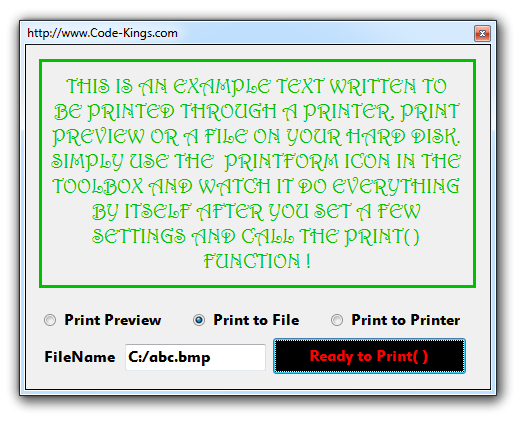
The objective here is to print a Windows Form to the Printer or a File on the HDD. You can also have a Print Preview before you print a WinForm. See the Form below that we shall print. We will encounter one small problem i.e. the button, radio buttton and textbox are not required for printing. We only wish to print the written text written above in Green color. There is VS 2012 source code at the very end. See the code and explanations below the image:
Visual Studio 2012 and 2010 as well come with a very special and useful tool in the tool box. Located in the Visual Basic PowerPacks section with many other useful tools(that we shall explore in later posts), it is named PrintForm and makes printing very easy for everyone. The whole form prints as it is to a file or printer. Also note that the borders of the window are NOT printed which is really cool! So you dont have to worry about the borders but you do have to worry about some unwanted stuff, like for example the "Ready To Print()" button with the other radio buttons and textbox shown above iare not really needed in the print. So we simply trim the size of the form before we fire the Print() function of the PrintForm. Watch the code below:
namespace Print_a_WinForm
{
public partial class Form1 : Form
{
public Form1()
{
InitializeComponent();
}
// The PrintAction determines what
the PrintForm object actually
// does. It has three simple options to
choose.
// Below, we chose it to
"PrintToPreview"
// It simply opens a Print Preview
Window.
private void btnPrintPreview_CheckedChanged(object sender, EventArgs e)
{
if (btnPrintPreview.Checked == true)
{
printForm1.PrintAction =
System.Drawing.Printing.PrintAction.PrintToPreview;
}
}
// Below we have set the PrintAction
to PrintToFile
// It does exactly as it says.
// It creates a Image file on the
Hard Disk of the
// current state/look of the Windows
form.
// The file name is selected in the TextBox and set to the
// PrintFileName property of the PrintForm object.
private void btnPrintToFile_CheckedChanged(object sender, EventArgs e)
{
if (btnPrintToFile.Checked == true)
{
printForm1.PrintAction =
System.Drawing.Printing.PrintAction.PrintToFile;
printForm1.PrintFileName = txtFileName.Text;
}
}
// Set the PrintAction to
PrintToPrinter
// to give output to a physical printer that you may
have.
private void btnPrintToPrinter_CheckedChanged(object sender, EventArgs e)
{
if (btnPrintToPrinter.Checked == true)
{
printForm1.PrintAction =
System.Drawing.Printing.PrintAction.PrintToPrinter;
}
}
// The process of trimming the
unwanted controls is
// by simply reducing the height of the Form.
//Here we have reduced it from 376 to
289.
// After that the unwanted controls
are no longer visible
// and it is safe to print the form.
private void btnReady_Click(object sender, EventArgs e)
{
this.Height = 289;
printForm1.Print();
}
}
}
Download Visual Studio 2012 Code Directly from Here

